Choose a narrow observation topic first
If you are making a leaf observation poster, do not keep the topic too broad. Instead of just writing about autumn leaves, focus on something smaller, such as one week of leaf color changes, differences between leaves on the same tree, or how a leaf changes before it falls. A smaller topic makes the content clearer and easier to arrange on the page.
Your title can mention both the object and the process, such as “A Week of Ginkgo Leaf Changes” or “What I Noticed About Maple Leaf Colors.” This makes the poster feel like a real observation project.
Useful sections for the poster
1. What I observed
Briefly explain what kind of leaf you observed, where you found it, and how long you watched it. Keep the language simple and direct.
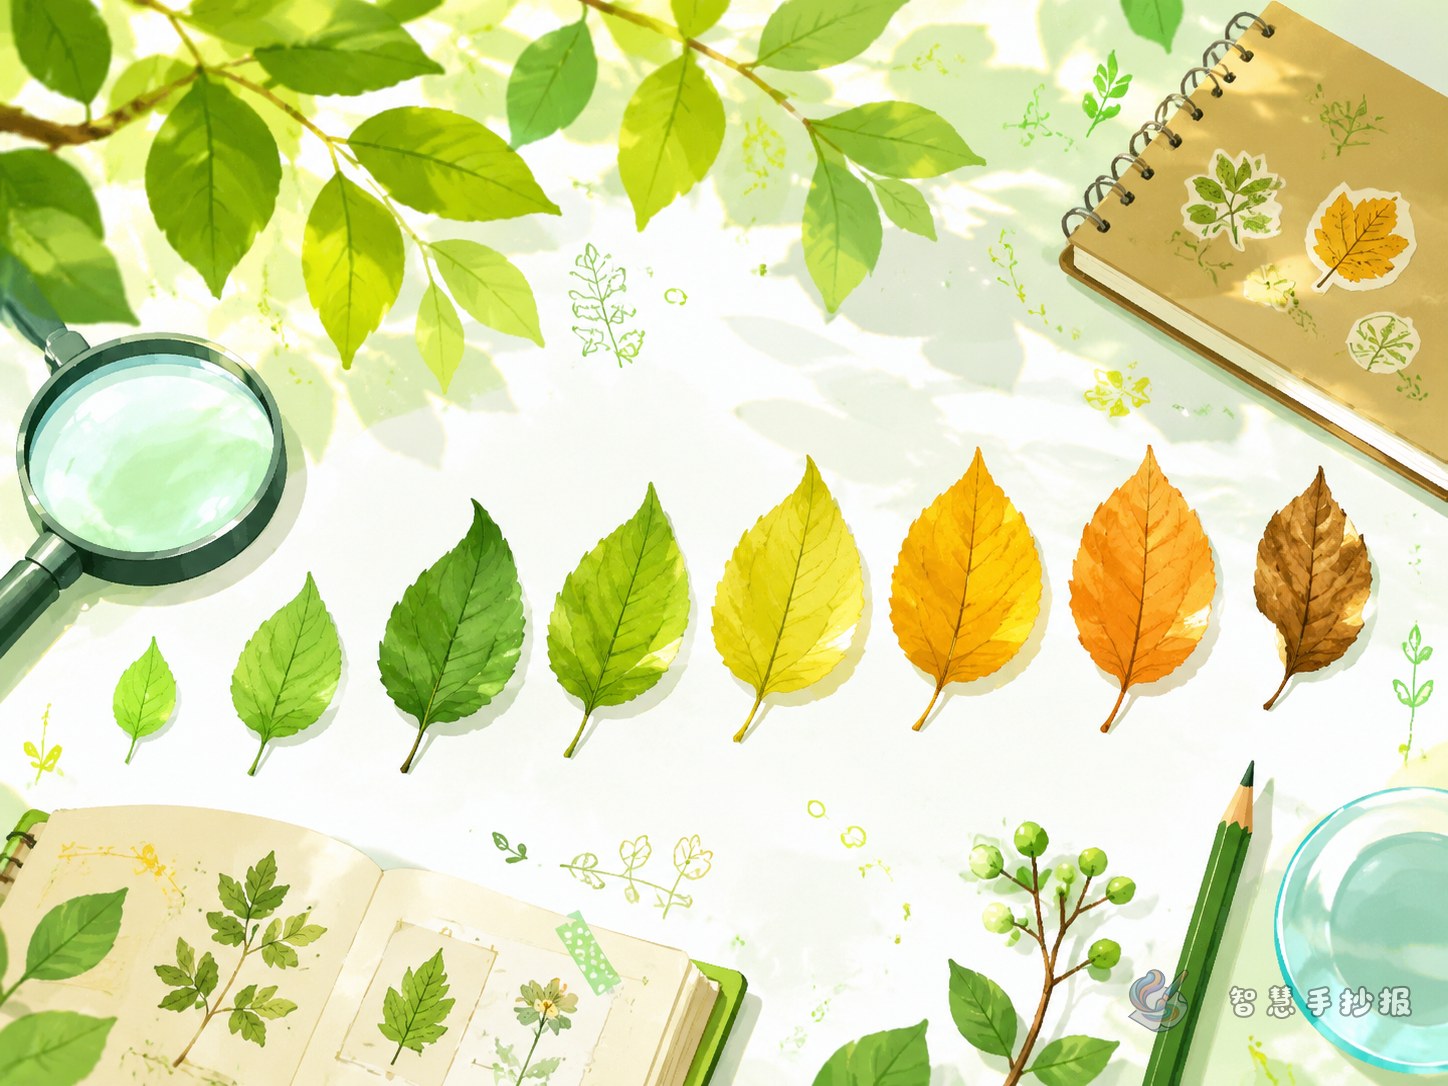
2. Daily change record
- Day 1: The leaf is green, smooth, and the veins are clear.
- Day 3: The color becomes lighter and a little yellow appears.
- Day 5: The tip looks dry and the leaf curls slightly.
- Day 7: The whole leaf turns more yellow or red and feels crisp.
This part works best as short points because it is easy to read and helps the poster look organized.
3. What I discovered
You can write about why leaves may change color, how weather affects them, or why leaves in sunny places may change differently. You do not need difficult scientific words. The key is to connect what you saw with what you thought.
4. Mini knowledge box
For example, you can add that when chlorophyll decreases, other colors in the leaf become easier to see, or that different trees change color at different times. Short facts like these are perfect for filling smaller spaces.
Ready-to-use writing ideas
You can adapt these sentences for your own poster:
- I observed a leaf from a tree on campus and recorded its changes for several days.
- At first, the leaf was dark green, soft, and had clear veins.
- As the weather became cooler, the leaf slowly changed to a lighter color.
- I noticed that leaves in different places changed at different speeds.
- Leaf color change is not only beautiful, but also a sign of seasonal change.
- This observation helped me pay more attention to nature around me.
If you still have empty space, you can add small sections such as “My favorite leaf,” “How I felt while observing,” or “What I want to observe next.”
Try a timeline layout instead of equal boxes
This topic looks great with an uneven layout. Put the main title in the center, make a timeline on one side, and create a leaf feature card on the other side. At the bottom, add your discoveries and a small science corner.
- Suggested colors: green, yellow, orange, and brown.
- Decoration ideas: leaves, branches, dew drops, and wind lines.
- Writing tip: use short sentences instead of long blocks of text.
- Design tip: leave some blank space so the page does not look crowded.
If you want a cleaner final result, you can continue arranging the poster in the WeChat mini program and make the title box, side notes, and observation area look more balanced.
How to make it feel like observation, not copied facts
Teachers usually like real observation details more than long copied explanations. Try to describe what you truly saw, such as where the color changed first, whether the surface became harder, or whether the leaf started to fall.
You can also add one or two personal thoughts, like “I did not know one leaf could show the change of seasons” or “I found the veins easier to see after the leaf turned yellow.” This makes the poster more lively and personal.
A simple ending that works well
Your ending does not need to be long. Just summarize the observation process, the most obvious change, and what you learned. That is enough for a neat school poster.
For example: This leaf observation helped me understand that plants change with the season and weather. By observing carefully, I discovered small but interesting secrets in nature. After finishing the draft, I can continue improving the layout in the Zhihui Shouchaobao WeChat mini program.