Start with a question: how does a robotic arm hold an object?
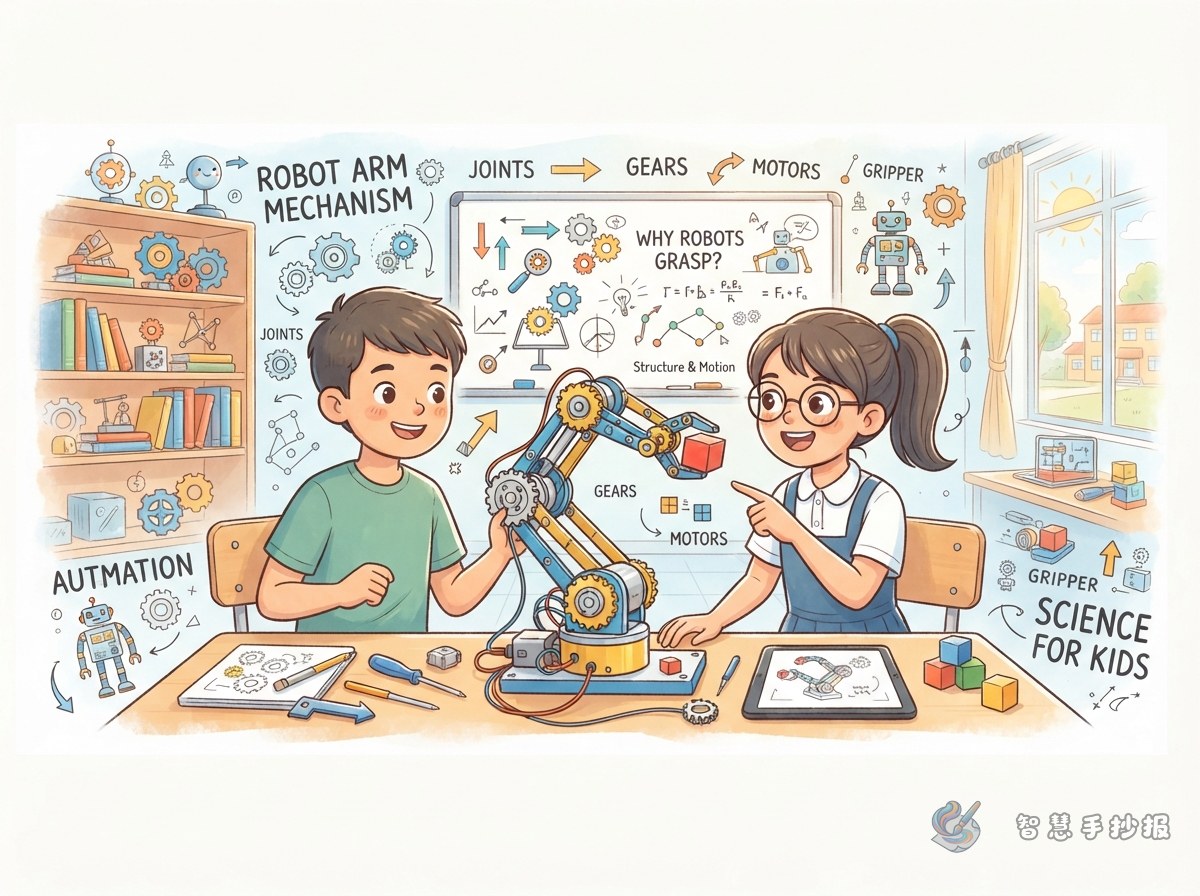
This handwritten newspaper can focus on how the parts inside a robot work together. Instead of drawing an ordinary robot, show a robotic arm picking up a block, gripping a ball, or moving a box. A clear title could be “Why Can a Robotic Arm Grab Things?”
Explain at the beginning that a robot needs a supporting structure, power parts, motion-transmitting parts, and an end tool. These parts cooperate to make the arm extend, rotate, and grip.
Draw a “power route” through the robot
Place a simple robotic arm in the center and use arrows to show how motion travels. Start with the base, then draw the rotating platform, joints, links, wrist, and gripper. This turns a complicated structure into an easy-to-follow route.
- Base: Supports the arm and helps it stay steady while turning.
- Joints: Change direction like a person’s shoulder, elbow, and wrist.
- Links: Connect the joints and form the length of the arm.
- Motor: Supplies turning power, like the robot’s small muscles.
- Gripper: Holds, lifts, or pushes an object at the end of the arm.
Add short notes such as “power starts here,” “motion travels here,” and “the tool works here.” These labels help younger students understand each part.
Four useful sections for the page
Robot parts dictionary
Choose six words: base, joint, motor, gear, link, and gripper. Give each one a short explanation and place them in colorful cards.
Why are gears useful?
Write that gears transmit rotation and can change its speed and force. A large gear and a small gear mesh together like two wheels working as a team.
What can a robotic arm do?
List assembly, carrying objects, working in dangerous places, and helping with experiments. Emphasize that robots can assist with repetitive, dangerous, or very precise tasks.
My own little robotic arm
Leave space for an original design. Students can write what it will pick up, how many joints it needs, what tool it has, and how it will avoid damaging an object.
Give the layout the feeling of a machine
Use a large central drawing with explanations around it. Put the parts dictionary on the left, gear facts on the right, and uses plus the creative design at the bottom. Blue, orange, and silver can suggest technology and metal.
Decorate the border with gears, nuts, dotted arrows, and small screws, but keep the words easy to read. Use different colors for different parts: orange for joints, red for motors, blue for links, and green for the gripper.
A simple finishing checklist
- Sketch the size and direction of the central arm before adding text boxes.
- Make sure every label points to the correct part.
- Use short sentences that younger students can understand.
- Keep one area open for an original robotic-arm idea.
- Check that the title, section names, and key words are clear.
If you need help planning the page, you can continue in the Wisdom Handwritten Newspaper WeChat mini program, choose a suitable technology layout idea, and replace the sample text with your own robotic-arm design.