Choose One Plant Instead of Ten
When students get the topic of a campus plant observation poster, they often try to include every tree and flower on campus. The result is a long list where each plant gets only one sentence. A stronger approach is to pick one plant you pass every day: the tree outside your classroom, the shrubs beside the track, or the hedge on your way to school.
Once the main plant is fixed, the whole poster shares one name, one location, and one observation period. Write the main title as "The Campus Plant I Observe - [name]" and add the observation spot and dates underneath.
Six Details Every Plant Profile Card Needs
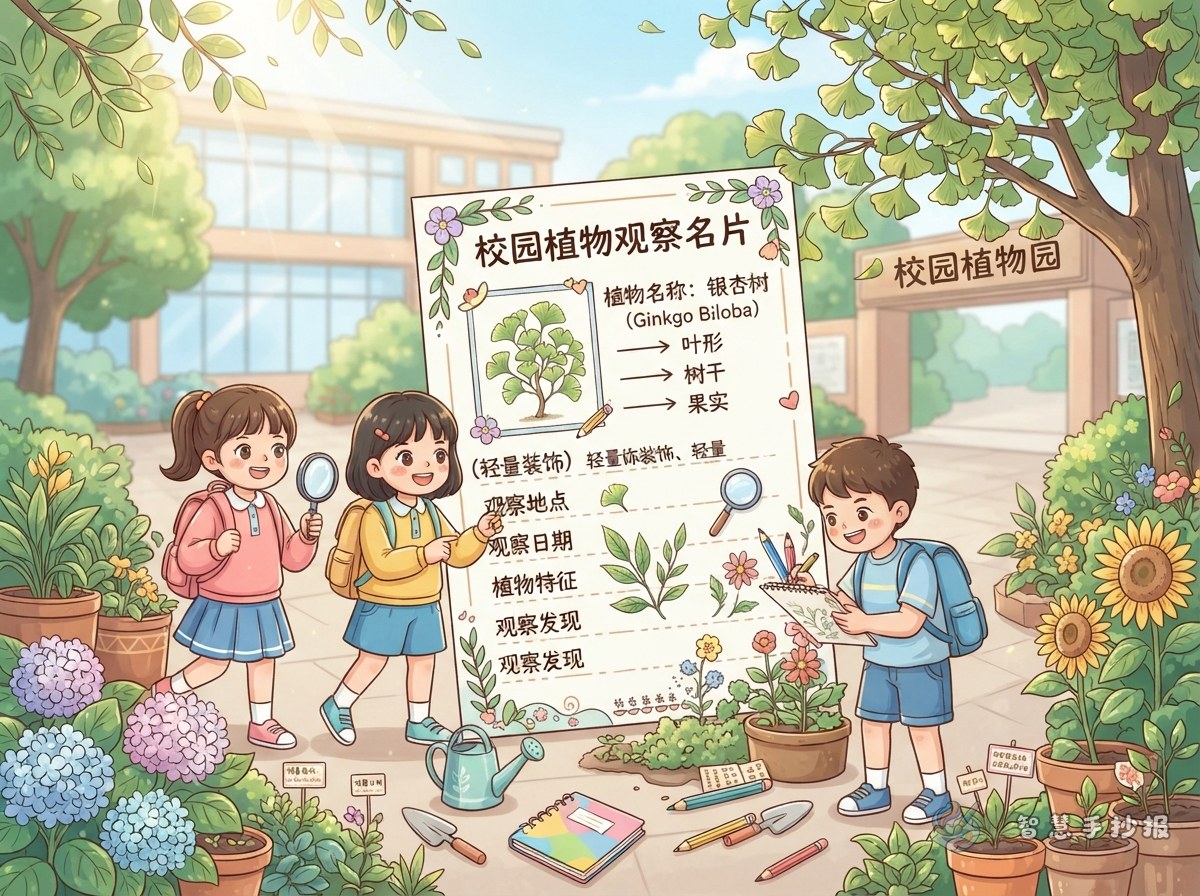
Place the profile card in the most visible part of the sheet, framed in a box or a rounded card.
- Plant name: write the everyday name large, and add a nickname or local name in small letters if you know one.
- Location: be specific, such as "third plant in the flowerbed east of the teaching building."
- Overall shape: is it a tree, a shrub, or a herb? How tall is it, and do the branches spread out or grow upward?
- Leaves: what shape are they, are the edges smooth or toothed, and do they feel soft or rough?
- Flowers and fruit: has it bloomed? What color are the petals, how many are there, and are there small fruits?
- Observation date: note the date and weather of your first visit, then keep adding later dates.
Build an Observation Table That Looks Scientific
A science feel comes from comparison, so leave space for a simple table and fill it in every few days.
- Draw the headings first: date, weather, height or branch length, number of leaves, changes in flowers or fruit, and new findings.
- Younger students can keep only three columns: date, weather, and today's change.
- If measuring is hard, write descriptions such as "a little taller than last time" or "now above my knees."
- Save the last column for new findings, such as an insect on a leaf or flowers opening earlier on the sunny side.
Neatness matters more than perfect lines. Use a ruler lightly and write the table text one size smaller than the body text.
Splitting the Sheet: Card, Table, Sketch
- Left third: the plant profile card with a small drawing of the whole plant.
- Middle or right: the observation table and a short observation diary with evenly spaced lines.
- Bottom or corners: close-up drawings of a leaf, a flower, and a fruit, plus one sentence about what surprised you.
Use thick strokes for headings and thin strokes for body text so the two levels stand apart. Limit yourself to about four colors; green with pale yellow suits a plant theme well.
Sentences You Can Copy
- "I found this [plant name] at [place]. It is the oldest neighbor of our class."
- "The top of the leaf is dark green and the underside is lighter, with a slightly rough texture."
- "On my first visit there were no buds. By my fourth visit, small [color] flowers had appeared."
- "My new finding: [one sentence about the change you noticed]."
Small Upgrades After the First Draft
If you have extra time, fold a small observation slip and attach it beside the profile card, or draw a row of four dated sketches showing how the plant changed across the month. For layout help, open the ZhiHui ShouChaoBao mini program in WeChat, choose a campus plant template, and enter your profile details and observation data before copying everything neatly onto paper.